Security Groups
9 min
All About Security Groups
A Security Group is a designated group of Users who have permission to see specific contracts or features in SHI One. Security Groups must be set up in order to complete the onboarding process.
Note: Only Admins can set up Security Groups.
- Admins can create and assign permissions for specific contracts to different Security Groups
- Admins can add new and existing users to Security Groups
- Users must be assigned to a Security Group before they can view any data in SHI One
- Admins can view and access all data in SHI One by default
- All users must be assigned to a Security Group in order to submit Support Requests
- Users can only submit Requests for the contracts, permissions, and accounts associated with their assigned Security Group(s)
- Admins can designate a Security Group Manager for each Security Group; that Security Group Manager can add existing users to that specific Security Group
- Admins and Security Group Managers will be notified about any Security Group configuration issues that may lead to users being unable to submit Support Requests
- Clicking on the notification will bring you to that Security Group's page
If a user cannot see data in SHI One, it means they have not been added to a Security Group. Users can only view data for the contracts, permissions, and accounts associated with their assigned Security Group(s).
Security Group Setup
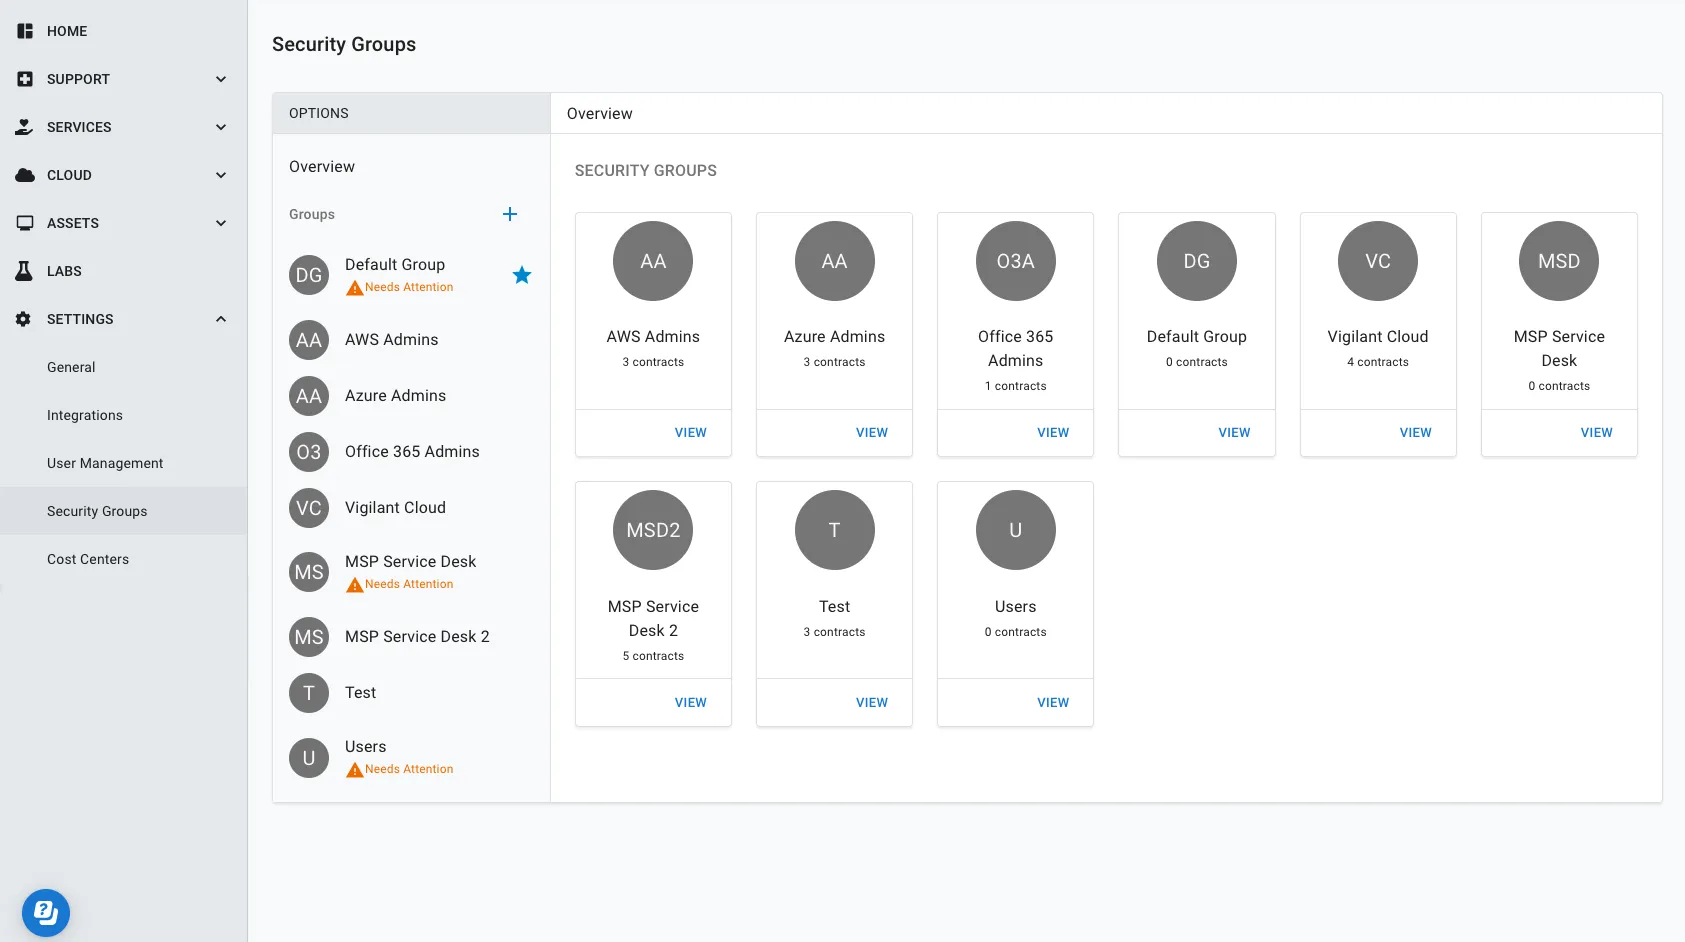
Step 1: Creating a Security Group
- In the left sidebar, navigate to Settings > Security Groups
- First Time Users: Scroll down to the bottom of the page and click Enable Security Groups.
- In the OPTIONS column, click on the plus icon (+) to create a Security Group. A dialog box appears.
- Enter a name for the Security Group.
- Click CREATE.
Step 2: Adding Contracts
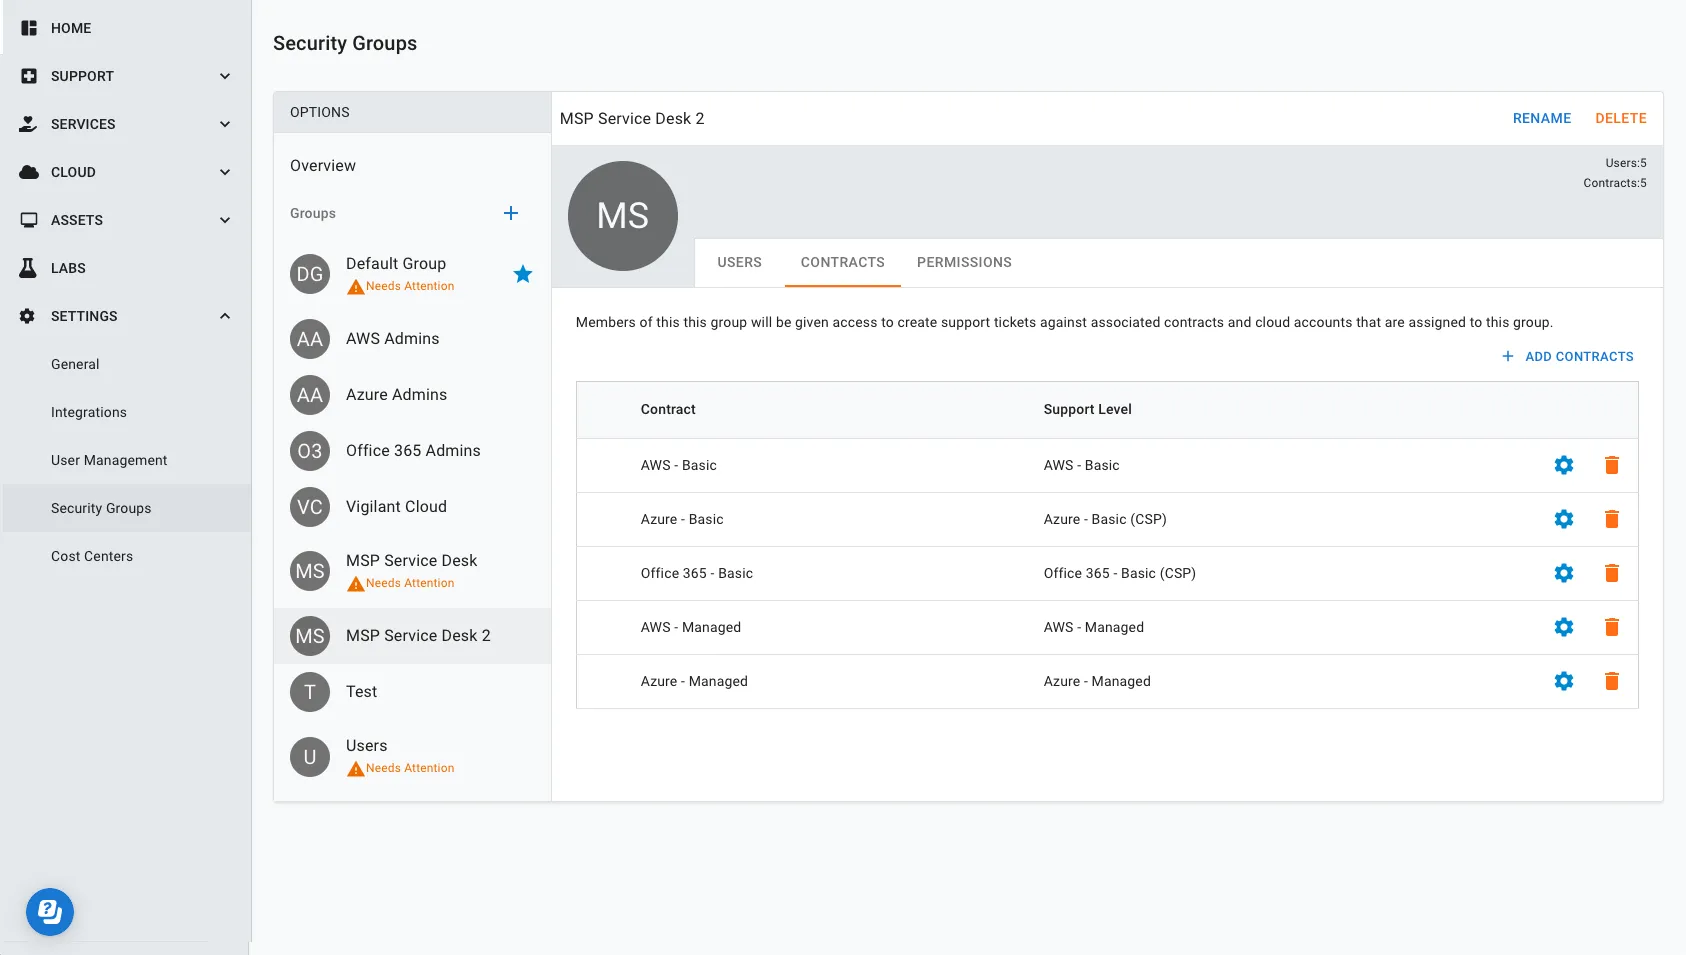
- After clicking CREATE, click on the name of the Security Group you just created.
- Click on the CONTRACTS tab.
- Click + ADD CONTRACTS. A dialog box appears.
- Select the contracts in the left column that you want to assign to this Security Group.
- Click on the right arrow > button to move those contracts to the right column.
- Click ADD CONTRACTS to save your selections.
Step 3: Setting Permissions
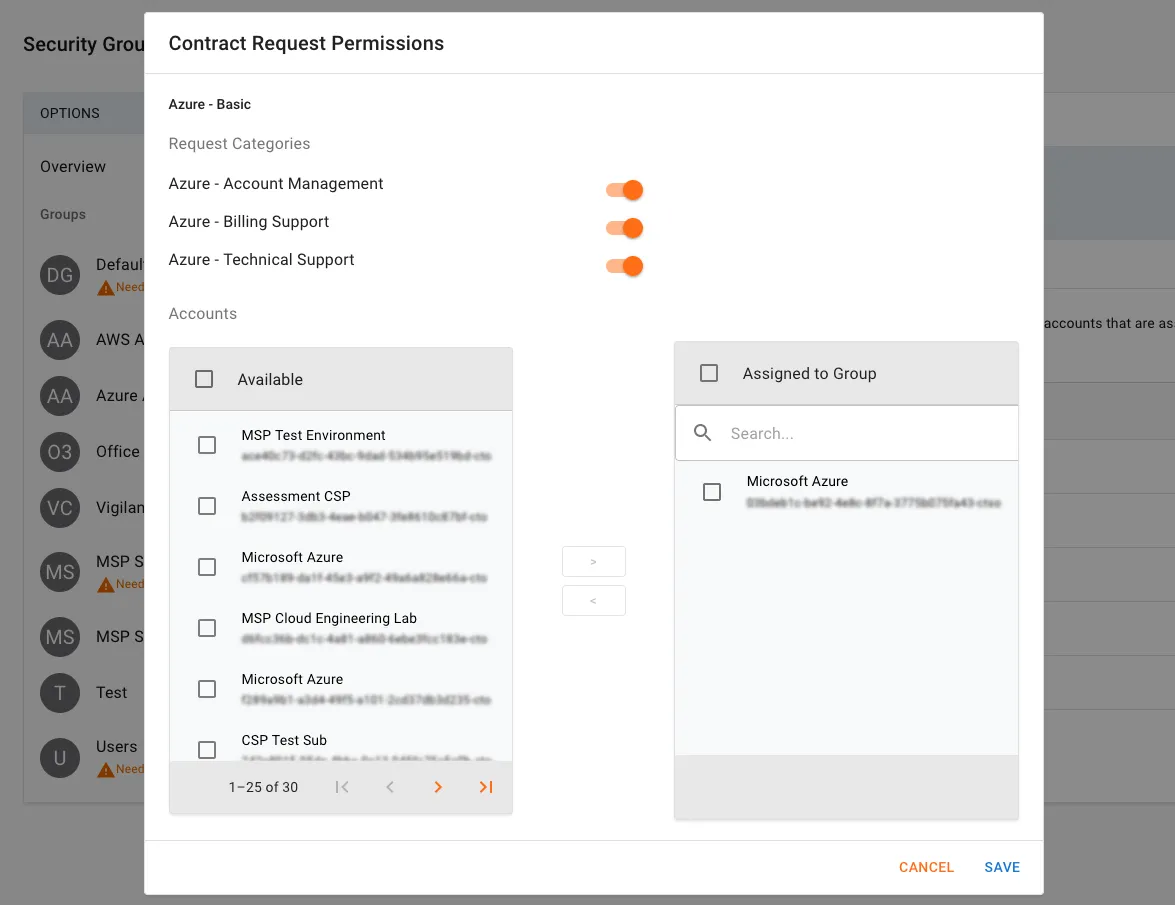
- In the CONTRACTS tab, click the blue gear icon to the right of each contract. A dialog box appears.
- Choose which Request Categories will be available to users in this Security Group.
- Select the subscriptions or accounts this Security Group can access in the left column.
- Click the right arrow button > to move the subscriptions or accounts to the right column.
- Click Save.
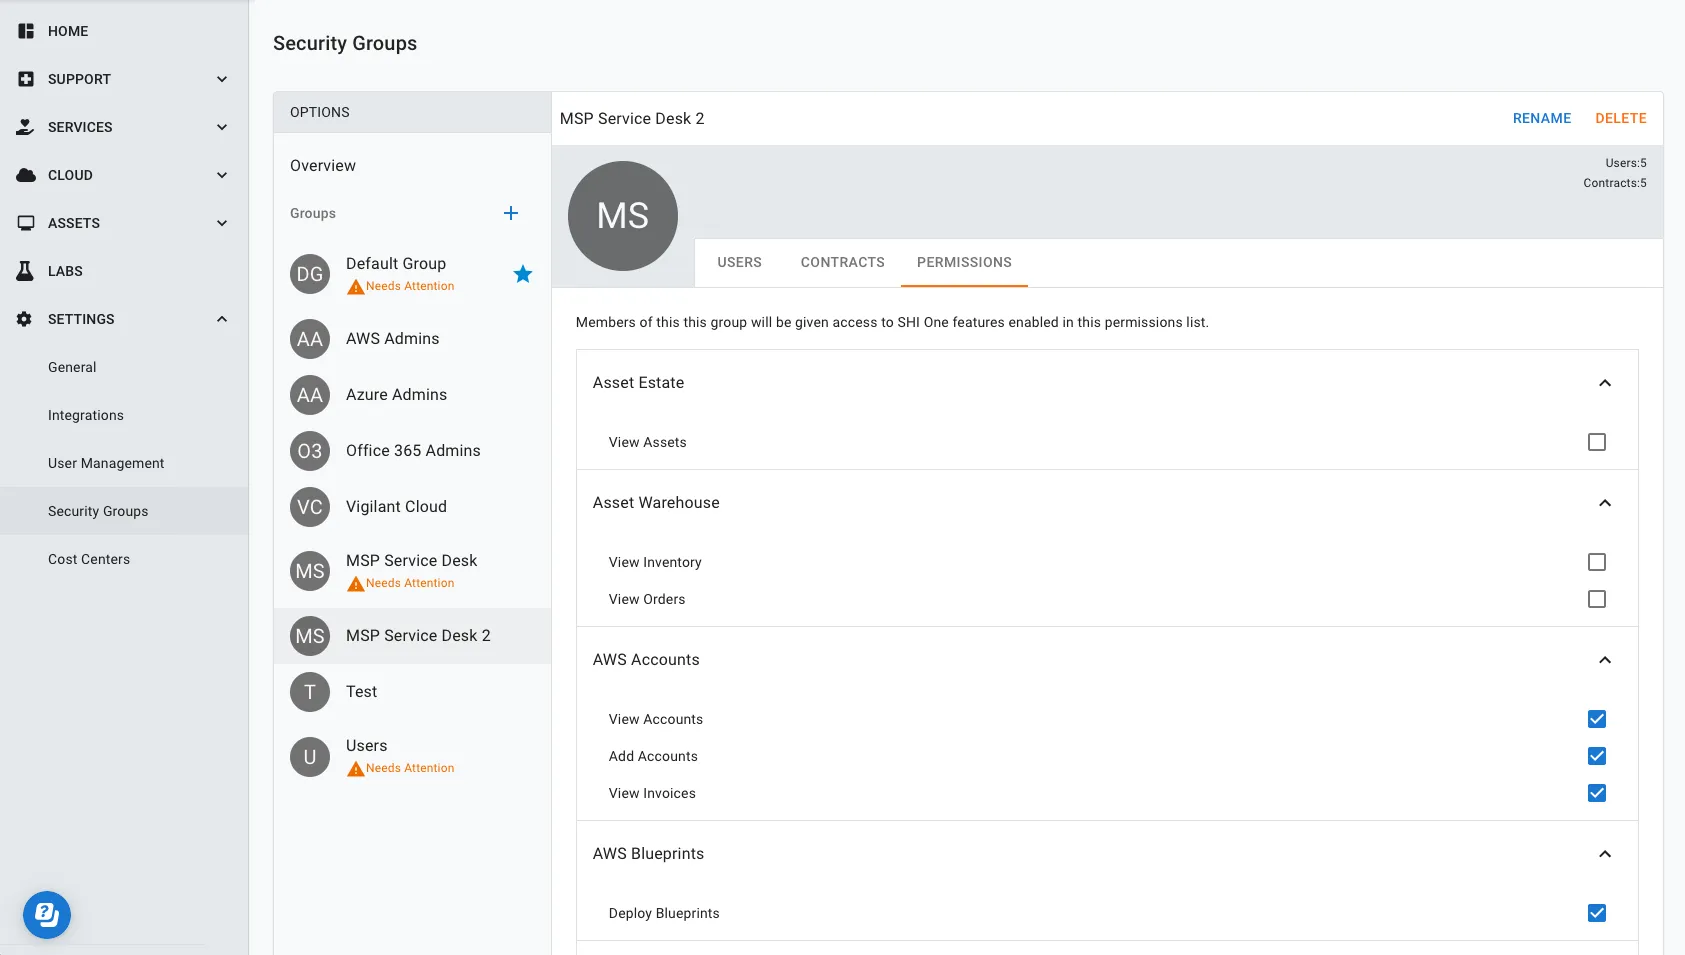
- Click on the PERMISSIONS tab.
- Check the box next to each permission that should be assigned to all users in the Security Group.
Step 4: Adding and Removing Users
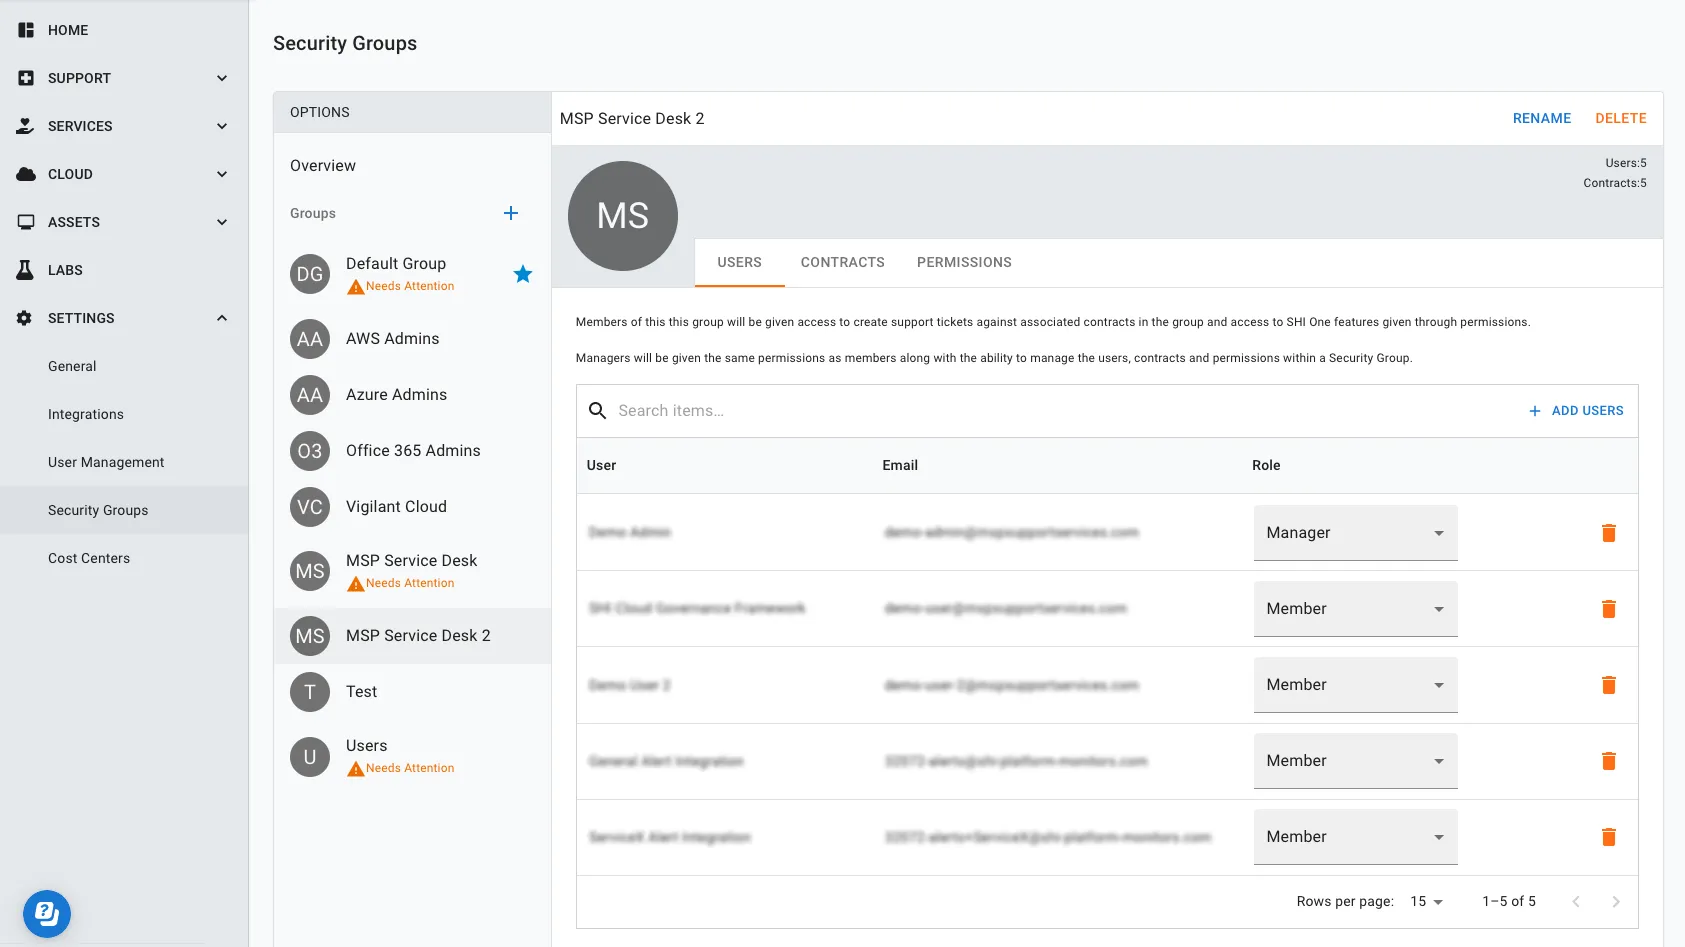
- Click on the Users tab
- Add a User
- Click + ADD USERS. A dialog box appears.
- Select the users in the left column that you want to assign to this Security Group.
- Click on the right arrow > button to move the users to right column.
- Click ADD USERS to save your selections.
- Select a Role
- Select the user's role in the drop-down menu. You can select either the Manager or Member role.
- Note: The default role is Member. A Manager has the ability to manage users, contracts, and permissions within a Security Group.
- Remove a User
- Click on the trash can icon beside a user's name to remove them from the Security Group.