Managing Initiatives & Milestones
9 min
This article explains how to manage your Initiatives, Tasks, and Milestones. For more information about roadmaps, see Roadmaps OverviewRoadmaps Overview.
Creating a New Initiative or Milestone
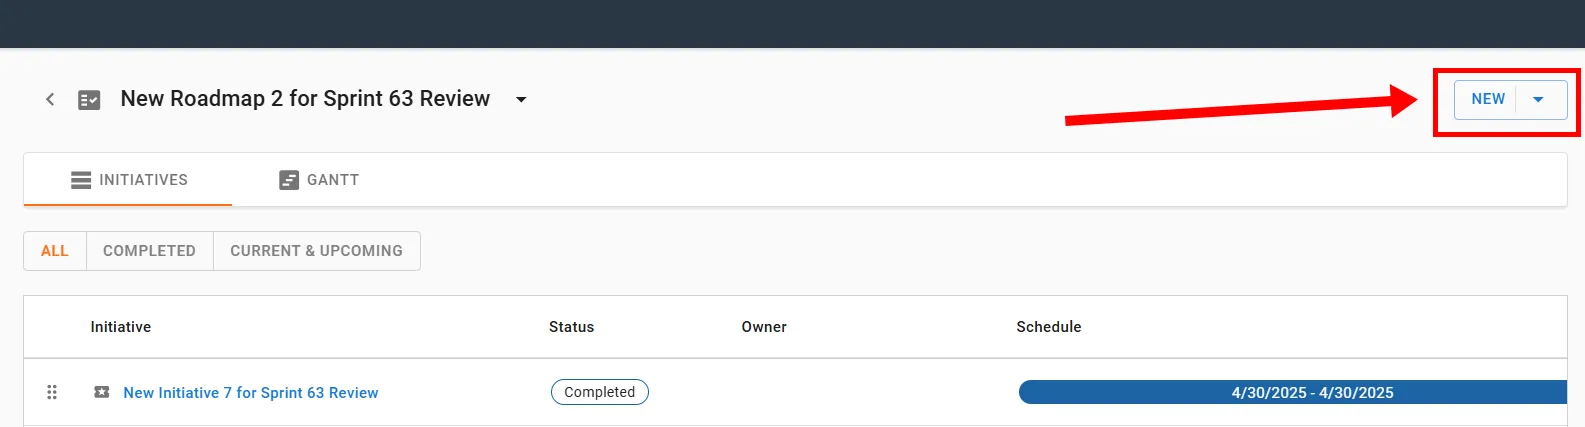
- In the left navigation menu, click Project Management > Roadmaps.
- Click on the name of the desired roadmap. If no roadmaps exist, the roadmap landing page will be empty. For more information on creating a roadmap, see Creating a RoadmapCreating a Roadmap.
- Click on the NEW button in the top-right corner and select New Intuitive or New Milestone in the drop-down menu. A dialog box appears. Follow the steps based on your selection:
- Creating a New Initiative
- Enter a name for the initiative.
- (Optional) Enter a description for the initiative.
- Select the current status of the initiative (Upcoming, In Progress, or Completed).
- (Optional) Enter the owner of the initiative.
- (Optional) Check the box if SHI is helping.
- (Optional) Select a start date for the initiative.
- (Optional) Select an end date for the initiative.
- (Optional) Add any relevant notes.
- (Optional) Add relevant files by clicking on the + ADD FILES link. You can drag and drop your files or brows your files.
- (Optional) Add any relevant links by clicking on the + ADD LINK link. Add the address and the text to display.
- (Optional) Add Tasks
- (Optional) Add tasks by clicking on the ADD NEW TASK button. Enter the name of the task, set the status, add the dates, and click CREATE.
- (Optional) Import a recommendation by clicking on the IMPORT RECOMMENDATION button. You can browse or search for recommendations. Check the box next to each recommendation you would like to add to the initiative and click ADD. For more information, see Recommendations Getting StartedGetting Started.
- (Optional) Add Assets
- Click + ADD FILTER, select the filters to specify the assets, and click APPLY. All assets in the results are selected. For more information about assets, see Assets Getting StartedGetting Started.
- (Optional) Enter estimated costs under the relevant categories (Hardware & Infrastructure, Software & Licensing, Services, and Support & Maintenance).
- Click SAVE or SAVE AND ADD ANOTHER to save the initiative. The newly created initiative will now appear in the grid view on the Initiative tab.
- Creating a New Milestone
- Enter a name for the milestone.
- (Optional) Enter a description for the milestone.
- Select the current status of the milestone (Upcoming, In Progress, or Completed).
- (Optional) Enter the owner of the milestone.
- (Optional) Check the box if SHI is helping.
- (Optional) Select a target date of the milestone.
- (Optional) Add any relevant notes.
- (Optional) Add relevant files by clicking on the + ADD FILES link. You can drag and drop your files or brows your files.
- (Optional) Add any relevant links by clicking on the + ADD LINK link. Add the address and the text to display.
- (Optional) Enter estimated costs under the relevant categories (Hardware & Infrastructure, Software & Licensing, Services, and Support & Maintenance).
- Click SAVE or SAVE AND ADD ANOTHER to save the milestone. The newly created milestone will now appear in the grid view on the Initiative tab.
Viewing & Updating Initiatives & Milestones
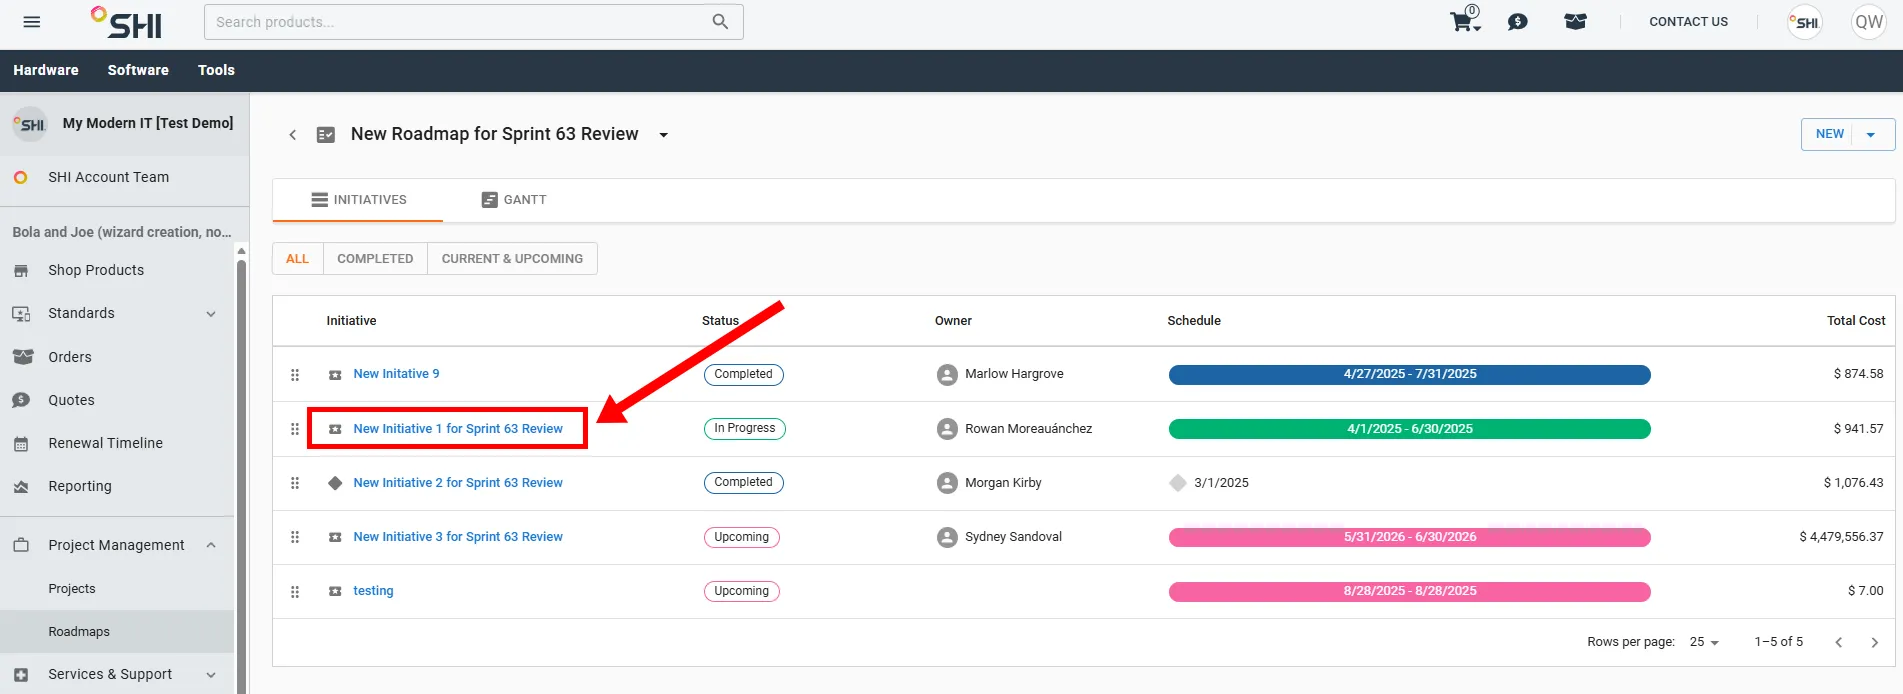
- When you click on the name of a roadmap from the landing page list, you enter the Roadmap Detail View.
- On the INITIATIVES tab, you'll see the grid displaying your Initiatives and Milestones.
- The grid shows the Name, Status, Owner, Schedule, and Cost of each Initiative and Milestone.
- Click on the name of the Initiative or Milestone you wish to update. A side container opens.
- Editing an Initiative or Milestone
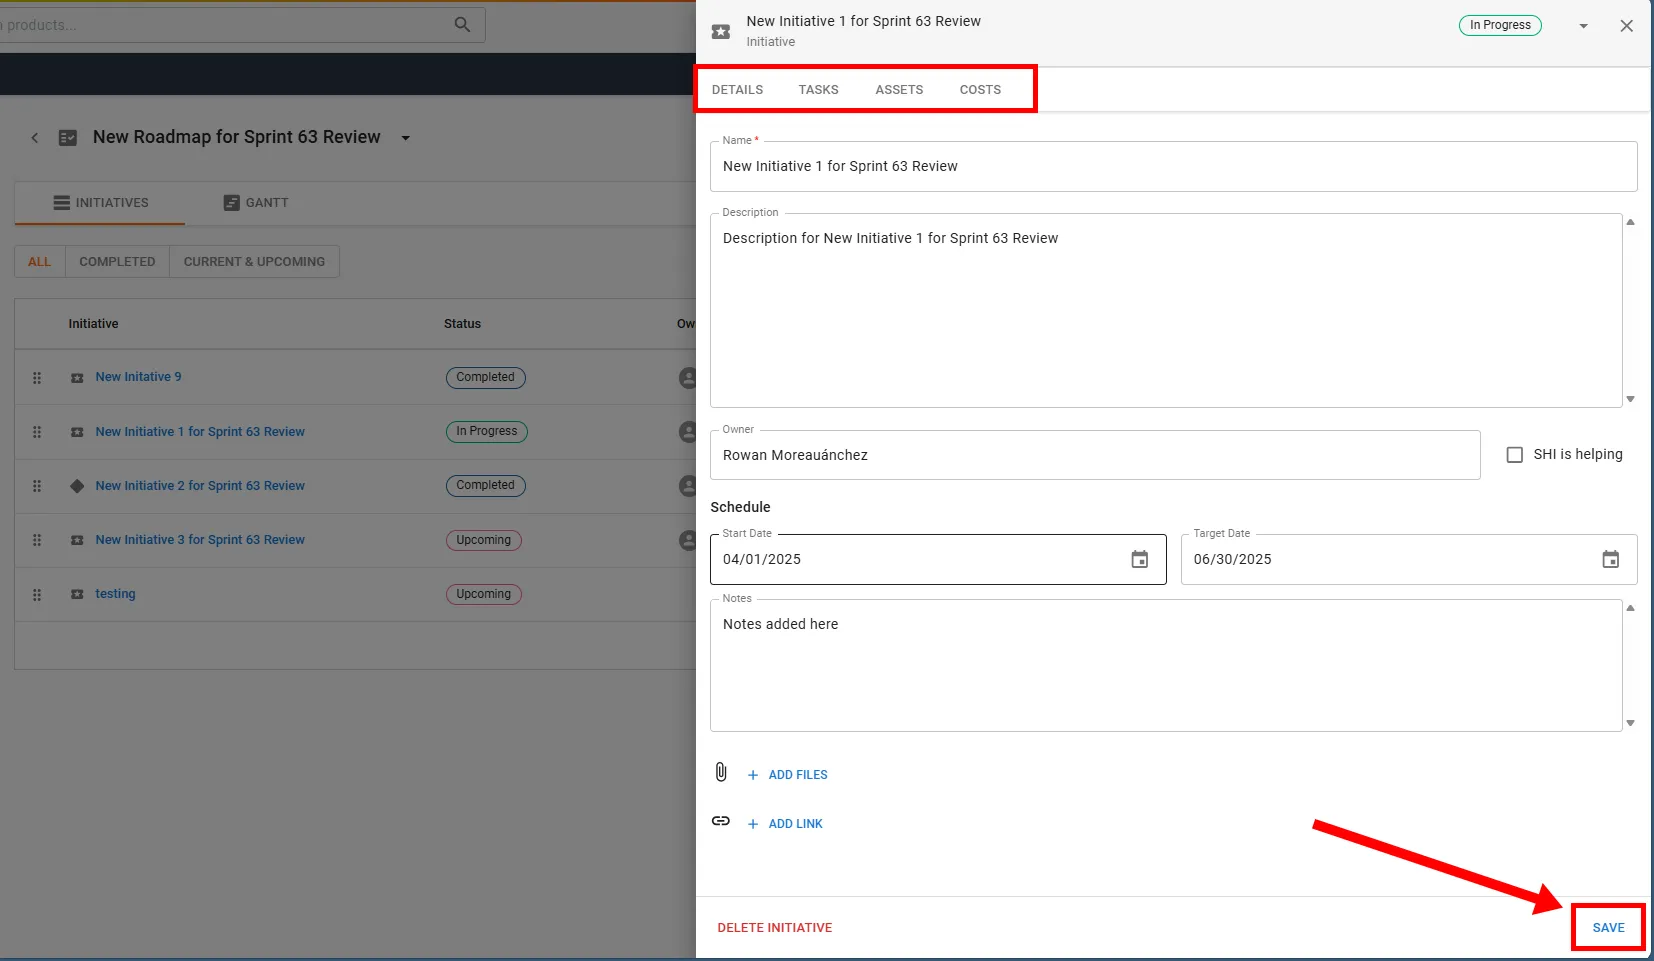
- Make your desired edits. You can use the tabs at the top of the container (Details, Tasks, Assets, Costs, etc.)
- Click SAVE at the bottom of the container to apply your changes.
- Deleting an Initiative or Milestone
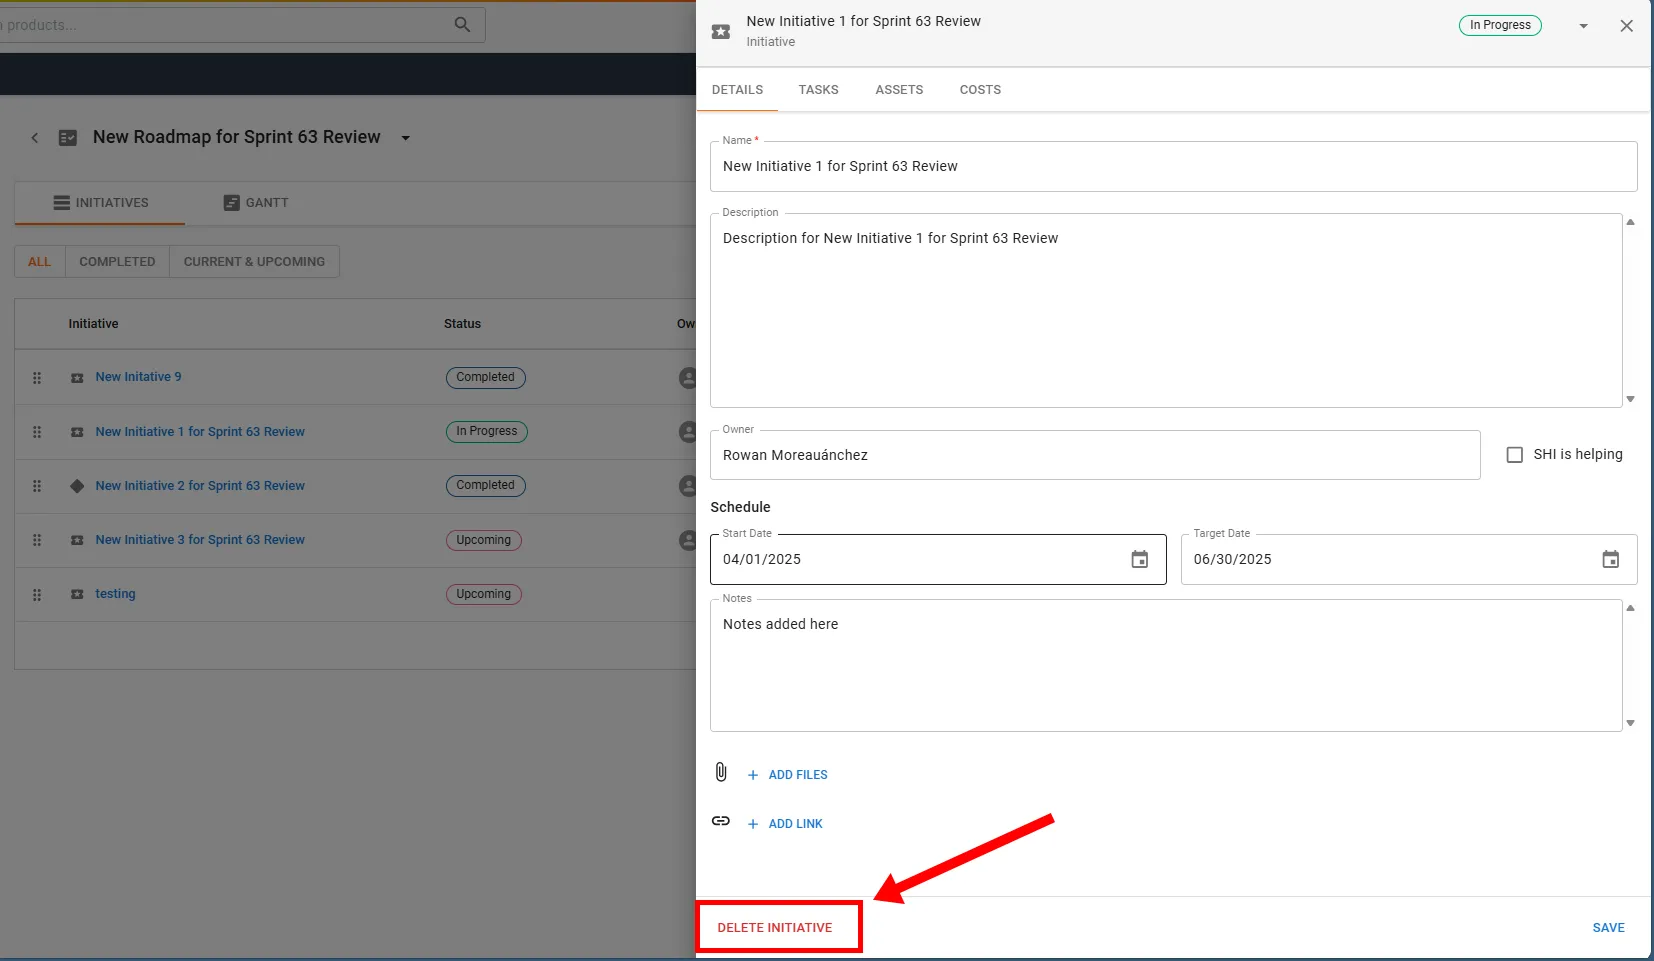
- Click DELETE INITIATIVE at the bottom of the container. A dialog box appears.
- Click DELETE to remove the initiative or milestone from your roadmap.
Adding Tasks to an Existing Initiative
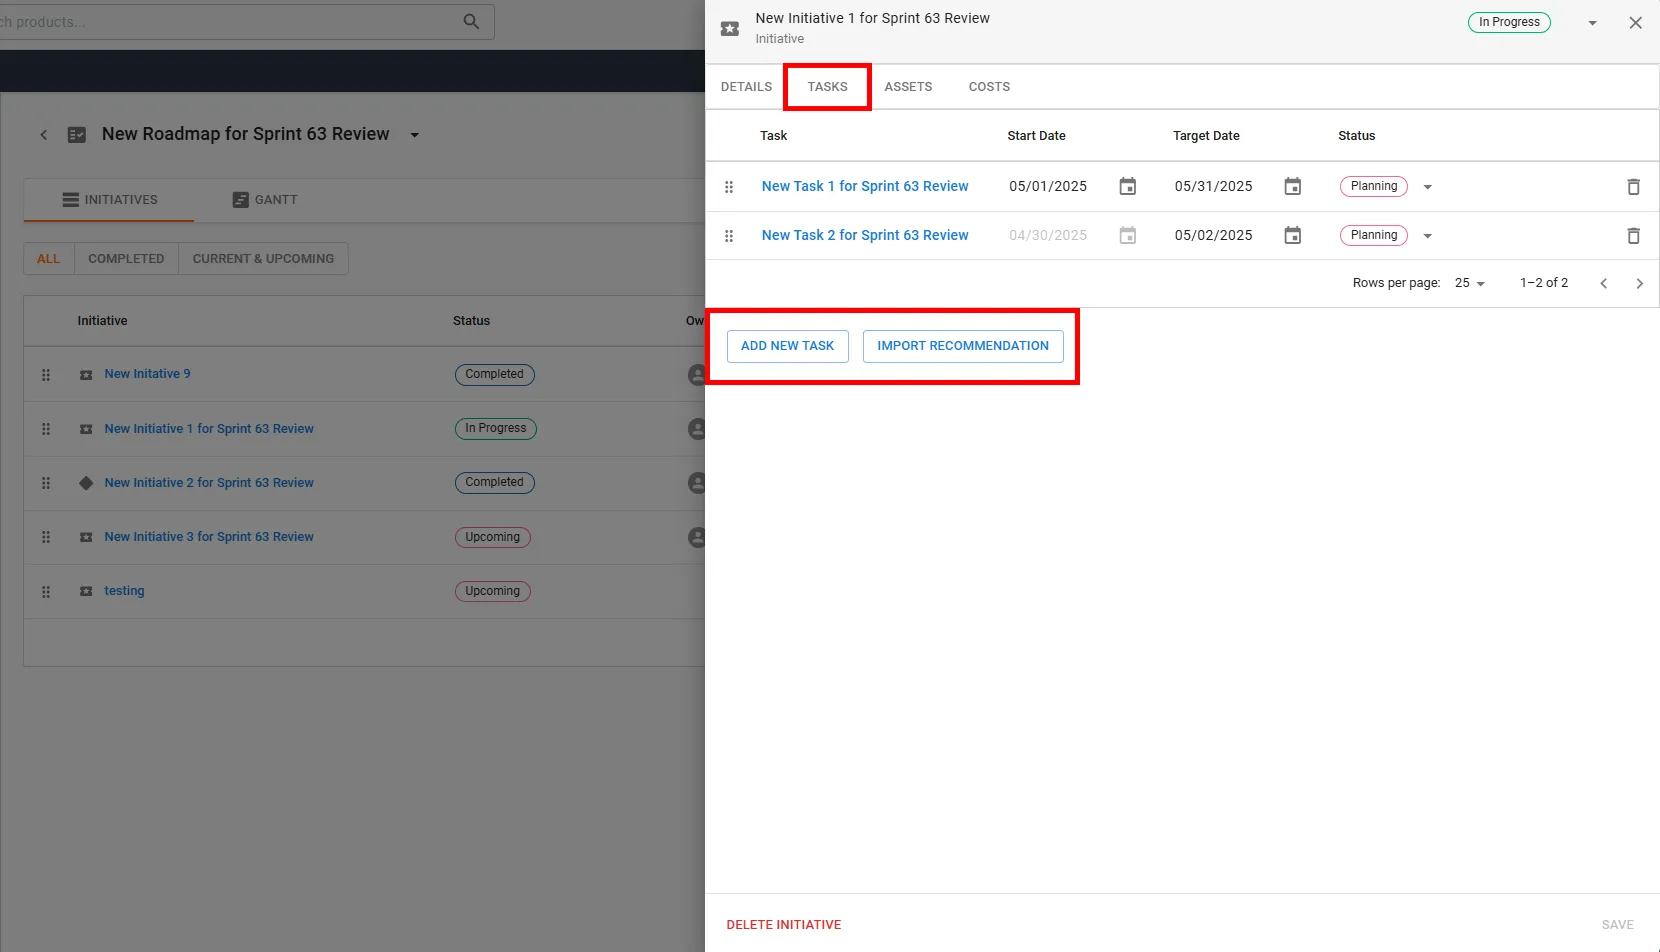
Tasks can only be added to Initiatives, either during creation or by editing an existing one. Milestones do not have tasks.
- When you click on the name of a roadmap from the landing page list, you enter the Roadmap Detail View.
- Click on the name of the Initiative you wish to add a task to. A side container opens.
- Click on the TASKS tab at the top of the container.
- Add New Task
- Click on the ADD NEW TASK button. A dialog box appears.
- Enter a name for the task.
- Select the current status of the task (Planning, Doing, or Done).
- (Optional) Select a start date for the task.
- (Optional) Select an end date for the task.
- Click CREATE to add the task to the initiative.
- Import Recommendation
- Click on the IMPORT RECOMMENDATION button. A dialog box appears.
- Browse or search for recommendations and check the box next to each recommendation you would like to add to the initiative.
- Click ADD to add the imported recommendations as tasks to the initiative.
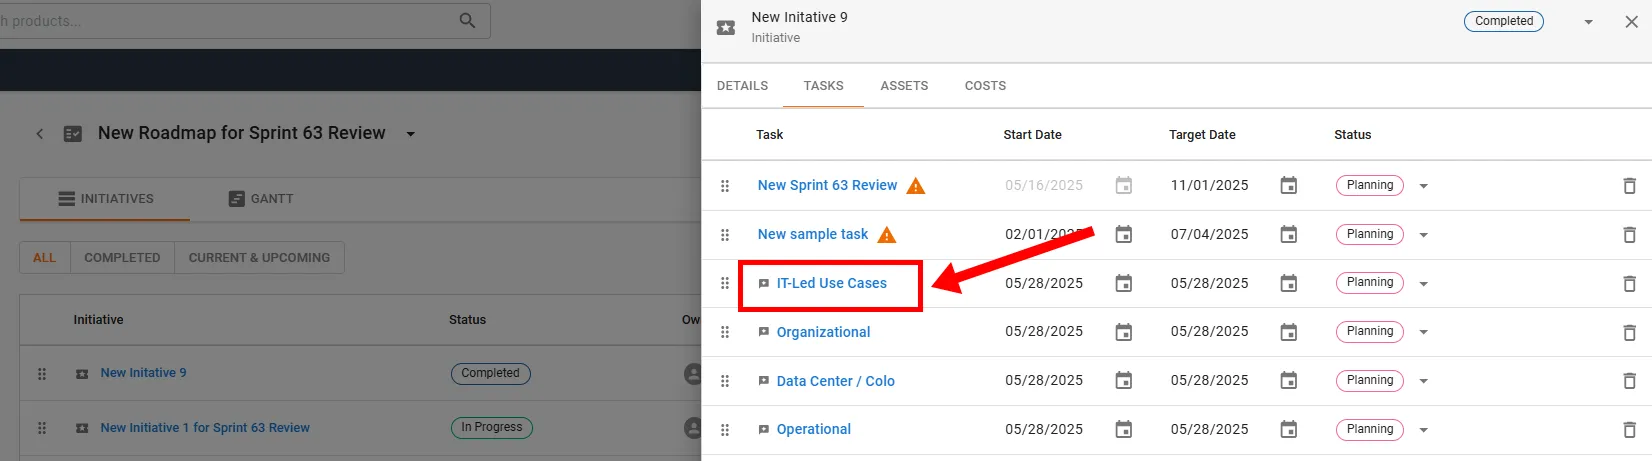
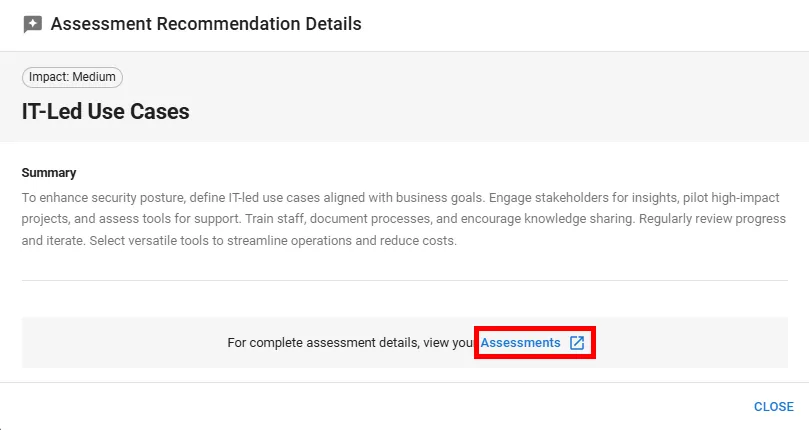
- Note: A small icon is visible next to the title of recommendations. Clicking on the name opens an "Assessment Recommendation Details" dialog box displaying more details about the recommendation. At the bottom there is also a link that will open a new tab with the specific assessment from which the recommendation originates.
Managing Tasks within an Initiative (Viewing, Editing, Reordering, & Deleting)
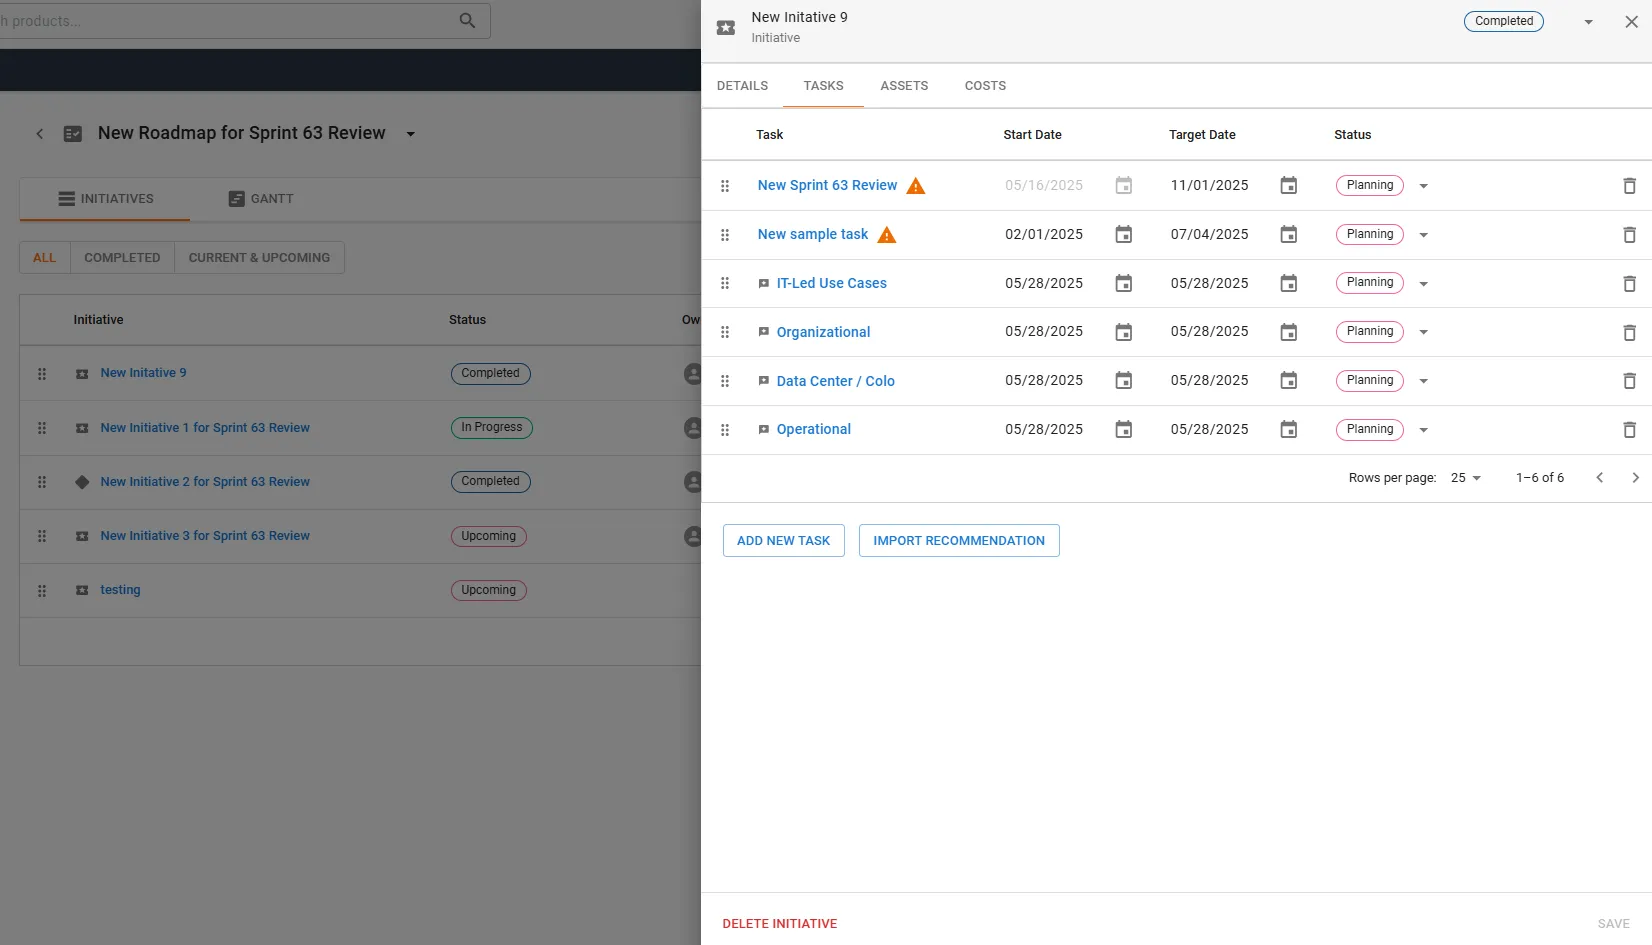
- When you click on the name of a roadmap from the landing page list, you enter the Roadmap Detail View.
- Click on the name of the Initiative or Milestone you wish to update. A side container opens.
- Click on the TASKS tab at the top of the container.
- Viewing
- If a task is an imported recommendation, clicking on its name will open an "Assessment Recommendation Details" dialog box. This view provides more information about that particular recommendation.
- Editing
- Locate the task you wish to edit and make your desired changes.
- Name - Click on the name of the task. Make your desired edits in the textbox and press Enter on your keyboard. Recommendations that are imported as tasks cannot be renamed this way, only new tasks.
- Date - Click on the calendar next to the date you wish to edit and select the desired date.
- Status - Select your desired status from the drop-down menu.
- Click SAVE when you are finished.
- Reordering
- Locate the 6 dots that appear next to the task you want to rearrange.
- Click and drag the task to the desired position.
- Click SAVE when you are finished.
- Deleting
- Click on the trashcan icon next to the task you want to remove. A dialog box appears.
- Click DELETE to remove the task from the initiative.